Showing posts with label Breads. Show all posts

It all Comes Down to Pizza

DLD: Pizza Dough & Pizza

I first published a recipe for pizza dough on this blog four years ago. Back then my wife and I were living in Idaho Falls, my wife had just started her internship at EIRMC, and I was looking for a full-time job. My oldest son was less than a year old, and life was a whole lot simpler, but not necessarily better. A lot has changed since then, but one thing has remained constant—I love pizza!!!!

Banana Bread

DLD: Banana Bread

When I was growing up, banana bread was one of those things that I could only ever remember my dad making. When the bananas would start looking so disgusting (to a young child) that they were ready to be thrown away, it was time for Dad to make banana bread. His recipe came from the Betty Crocker cookbook—you know, the one with the red cover—and it was the only recipe for banana bread that was ever made in our house.

The recipe yields 2 loaves, but in a family with 8 bread lovers, those loaves didn't stick around very long. It wasn't quite as bad as "if you blink you missed it," but it was close. Nowadays, with my family it lasts longer, but only because my little boys can't eat it. I still have to exercise restraint to not eat the entire loaf myself......in one sitting.....for real.

Zucchini Bread for CSID-ers

DLD: Coconut Flour Zucchini "Bread"

DISCLAIMER: This recipe is intended to be a starch-free/sucrose-free recipe.
This syrup is NOT low calorie or sugar-free.
Please use caution when adding a new food to a special or restricted diet—
—What works for my family may not work for yours.

There's not really much to say about this recipe. I wanted to make a version of zucchini bread that my CSIDers could have because there was a lot of zucchini and I really like zucchini bread. I started with my recipe for "normal" zucchini bread and proceeded to modify it as I saw fit in order to come up with this recipe.

Once comment on the nature of quick breads like zucchini bread and banana bread and the like—these are not really what I would consider bread. I have often fallen prey to the though process that banana bread is bread and that makes it good for breakfast, but it's time to start being honest with ourselves. Zucchini bread is really just cake. There is a much lower ratio of sugar & fat to flour than regular birthday cake, but quick breads often fall closer to cake than bread in the baked goods family tree.

This is not to say that I think you shouldn't eat banana bread or zucchini bread or those deliciously huge muffins you bought from the club store for breakfast. I am just saying that we need to be a little more honest in realizing that they really aren't that good for you. But hey, at least with zucchini bread you are getting some vegetables, right?


Anyway, I hope you enjoy the recipe. My oldest would probably eat it all day long, and his little brother really really wants to like it, and always asks for it, but never seems to be able to get that into it. Oh well. Have fun baking!


—Sam


Heavenly Dinner Rolls

DLD: Heavenly Dinner Rolls
Dinner in the Life of a Dad—Rich Dinner Rolls

I have a thing for breads. My wife says I have a gift for them, in fact. It is true that I love to bake bread, and have been doing so for a long time.

At first, I followed recipes found in books and online. These worked pretty well, and I learned a lot about baking from the experience. Then, when I was serving a LDS mission in Switzerland, I found Betty Bossi's Brot und Brotgerichte, and discovered that one can use a standard bread recipe and technique to make lots of different types of bread. I also learned the basics of the science of bread baking—namely that you can substitute ingredients as long as you somehow make up the difference.

Then, while working for Lofthouse, I was able to take a series of online classes from the American Institute of Baking, called "The Science of Baking." As part of this course I learned about bakers' percentage, which changed how I view baking forever. In short, bakers' percentage, unlike formula percentage, sets all ingredients as a percent of the total weight of flour. Why is this so life-changing? Well, it means that you can easily change the amount of one ingredient without having to recalculate every other ingredient. I always use this technique when I am writing a recipe.

This recipe started as a desire to make a really, really rich and delicious dinner roll to accompany some baked potato soup. I wanted something that was airy yet filling, sweet and rich yet chewy, and full of delicious flavor. The secret to achieving all of this is in the technique, the ingredients, and some patience. And without further ado, let's dive into the recipe for the best dinner rolls you will ever have.

Peanut Buttery Chocolate Buns

DLD: Peanut Buttery Chocolate Rolls
Dinner in the Life of a Dad—Peanut Buttery Chocolate Buns. Gooey and delicious, chocolatey and peanut buttery. Great alternative to cinnamon rolls!

I really don't know what to say about this recipe because I can only say delicious so many times. These buns are truly, completely, and amazingly delicious.

The idea from this recipe came from wanting to create, of all things, peanut butter and jelly bread. I found lots of recipes online for peanut butter quick breads, and for buns made from rolling out regular dough and spreading it with peanut butter and jelly before rolling it up again. They looked good, but seemed really messy, and I have never considered quick breads to be a true bread, but rather a kind of cake. I wanted sliceable sandwich bread with peanut butter in the dough. Once again, I had to make up my own recipe. Oh darn. (^_^)

I made a loaf, and found it to be tasty, and I immediately starting thinking of the possibilities. Then I saw an episode of Cook's Country where they made cinnamon buns, and the idea for this recipe just came together.

Basically, this is a basic sweet roll dough with peanut butter replacing the fat in the dough. I had to take out some of the flour as well to make up for the solids in the peanut butter, but more on that later. The filling is your typical cinnamon roll filling except you replace the cinnamon with cocoa powder. Instead of cream cheese filling I decided to go with a chocolate donut glaze to complete the recipe.

The flavor is intensely peanut buttery, with chocolate permeating the entire bun. If you are fan of peanut butter filled chocolate cups, you will absolutely love this recipe. Just make sure you invite some friends over or you will end up eating the entire batch by yourself.

The BEST Low-Carb Bread EVER!!!

DLD: The BEST Low-Carb Bread EVER!!!
Dinner in the Life of a Dad—The BEST Low-Carb Bread Ever!!! The last recipe for low-carb bread you will need.

Updated 3/9/2016 to include pictures of pizza made with this dough as the crust.

I have finally posted the tutorial for this recipe. To be honest, this is the longest I have ever worked on a recipe, and I only got it where I think I want it about a month ago. As you can guess by the title of this post, the following recipe is for low-carb bread.
My quest for a good recipe for low-carb bread started two and a half years ago when my two oldest sons were diagnosed with CSID (congenital sucrase-isomaltase deficiency). This disease creates, in very short terms, starch and sugar intolerance. After I got over the initial period of shock and decided to start making recipes—some of which are on this blog—I realized that a really good bread would be hard to find.
The main reason for this is that bread is mostly made up of wheat flour, which is about 75% starch, which is a big no-no for my kids. Low-carb breads, for the most part, rely on almond flour or coconut flour, and wind up more like quick breads or cakes than fluffy white bread. My goal was to find/write a recipe for bread which fit the following criteria:
  1. Would be low in digestible carbohydrates.
  2. Would have a bite & chew similar to that of "regular" bread.
  3. Would be made of easy-to-purchase ingredients.
  4. Would be leavened by yeast fermentation.
  5. Looked, smelled, and tasted good.
  6. Could be used in all applications like wheat bread.
I scoured the internet for recipes, and even tried a few out, but I wasn't ever really happy with what I found. There were some common elements to all of the recipes, so I decided to use those to create my own recipe.

Easy Dinner Rolls

A while back I posted about the versatility of a single bread dough. In the entire post I was going on about how a single bread recipe is easily modified to fit almost any application. I think I gave about 8 different ways the "master recipe" could be used.

Anyway, one of those applications was for dinner rolls. It had been a while since I wrote the recipe for those, and I have been wanting to make it again. Well, Sunday I got the perfect opportunity. My sister-in-law had done a roast in the Crock-Pot, and mentioned about 2 hours before dinner that she wished that she had asked me to make bread, because bread pairs well with roast. Enter the dinner rolls. I knew they wouldn't have tons of time to rise, but they would have enough.

Versatile Bread Dough

This post is to enlighten readers on the versatility of bread dough. I am not talking about the stuff that you buy in the freezer section of your favorite grocery store, but rather making minor changes to a master bread dough recipe to fit any of your needs. This isn't as complicated as it may sound, and knowing these tricks will change your bread baking experience forever.

I have been baking bread as long as I can remember (which is only about 8 or 10 years old). I started following recipes exactly, and needing a new recipe for every type of bread or roll I attempted to make. This is how most bakers start out: following recipes as written, making few (if any) changes. I baked like this until I read a Swiss bread cookbook, and my baking was changed forever.

What made such a difference, you may ask? Well, it was quite simple: the author used one bread recipe to make 8 different types of bread, another recipe for 6 types of bread, and a short "textbook" on bread-making in general. It wasn't until then that I realized that all bread recipes are basically the same, with a few minor modifications based on the target application.

The reason why this revelation changed my baking so dramatically was that it allowed me to focus on my bread-making technique instead of worrying about following the recipes. Now, I rarely look for a recipe when I want to bake. Instead I just take my master recipe and modify it a little to make what I want. What follows is my master recipe, followed by some of my modifications.

Pita Bread

The other day I was talking to my older sister, and somehow the conversation turned to baking, and from there it turned to the topic of tonight's recipe: pita bread. I only really have one memory of pita growing up, and it just so happens to be of my sister eating a pita stuffed with sprouts and other stuff. A stuffed sandwich: I thought it was the coolest thing ever. In the years that followed I didn't give pita much thought, until I served an LDS mission in Switzerland, and was introduced to the Turkish food Doener Kebap, which is very similar to a Greek gyro. Both of those sandwiches are a pita stuffed with meat, vegetation, and sauce, and are some of the most delicious foods in the world.
So, back to the point of my story. My sister shared with me a recipe for pita, which has since become one of my favorite bread recipes, and I made it five times within the first 3 weeks. Each batch makes 10 discs of deliciousness.

Pita Bread

Step 1:
Dissolve 2 1/4 tsp yeast and 1 tsp sugar in 1/2 cup lukewarm water.
Allow to sit for 15 minutes, or until very foamy.

Step 2:
In the bowl of your mixer combine 3 cups all-purpose or bread flour and 1 tsp salt.

Step 3:
Add the yeasty water to the flour, along with the remaining 1/2 cup water. Mix well with dough attachment.

Step 4:
Knead on medium speed for 10 minutes.

Step 5:
Gather dough into a ball, cover, and let rise for 2 hours.

For pictures and further instructions on making dough please refer to my pizza dough recipe.

Before you start working with the dough, preheat your oven to 500°F. It may seem like a very high temperature, and it is, but it is the key to making your pita have a pocket in them, which is what we want.

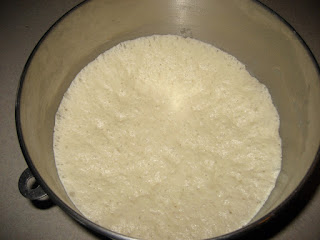
After rising, the dough will look like this.

Step 6:
Gather the dough into a ball.
I often weigh the dough when I am going to be dividing it so that each piece is the same size.

Step 7:
Divide the dough into 10 equal-sized portions and roll each one into a ball. Store the balls under a plastic bag so they don't dry out.

Step 8:

On a lightly floured surface, roll each ball into a 5" disc, 1/4" thick.
Resist the urge to make larger pita by rolling the ball into a larger circle. Doing so will make the dough too thin, and will create a cracker upon baking.

Step 9:
 If you are using a pizza stone, move it to the bottom rack.
Arrange three dough discs on the stone (my sister does up to 5 on a cookie sheet).

Step 10:
 Bake for 4 minutes, then flip and bake for another 2 minutes.
After about 2 minutes, the pita will seem to inflate. This is good: this is what creates the pocket in the middle of your pita. Mine often then pop and deflate while in the oven, but they still have a pocket.

Step 11:
 Remove to a rack and consume, or let cool and bag for up to a week at room temperature.


Pita Bread
1 cup lukewarm water, divided
2 1/4 tsp yeast
1 tsp sugar
3 cups all-purpose flour
1 tsp salt

Dissolve the sugar and yeast in 1/2 cup water. Let sit for 15 minutes, or until very foamy. Combine flour and salt in the bowl of a stand mixer. Add the yeast mixture and the remaining water and mix with dough hook until combined, then increase the speed to medium and knead for 10 minutes. Gather dough into a ball, cover, and let rise 2 hours. Preheat oven to 500°F and move rack to lowest position. Divide the dough into 10 equal-sized pieces, and roll each piece into a ball. On a lightly floured surface, roll each ball into a 5" disc, 1/4" thick. Arrange 3 at a time on a pizza stone or cookie sheet. Bake for 4 minutes, then flip and bake an additional 2 minutes. Remove to a rack. Enjoy warm, or place in an airtight container for up to a week.

Pizza Dough

I remember one of my favorite family traditions growing up was having pizza practically every Friday night. As long as I can remember, one of my parents made the pizza dough and, after letting it sit for a few minutes, formed it into the pizza pan. The pizza pans would go into the oven, and 15 minutes later we would eat. The pizza was warm, gooey, and delicious. Ever since I was old enough to learn not to burn my mouth on nearly molten cheese, pizza has been my favorite food.

This is not to say that my parent's pizza was the only pizza I had ever experienced: occasionally we would buy pizza, and I found that pizzeria pizza had an amazing crispy, chewy, yet thin and not at all hard crust. Actually, it reminds me more of a bagel crust than a bread crust. Anyway, this became probably my favorite crust, and what I imagine all pizza should aspire to have.

You all know the proverb about teaching a man to fish and he will eat for life, right? Well, eventually I became responsible in my family for making the pizza dough, and for years I was content to simply follow in the footsteps of my parents and use their recipe and method. But somewhere in the back of my mind I had made it my goal in life to make a pizza dough that fully emulates the pizzeria pizza I remembered eating as a child.

When I moved to Utah to attend college, this desire came more to the front of my mind, as I couldn't find acceptable pizza anywhere. Before long my pizza pangs were getting so bad that I succumbed to buying a pie from Pizza-Hut. But alas, it wasn't enough. I knew I had to teach myself to fish, so to speak. In my opinion, the secret to good pizza dough is near-excessive kneading of a wheat-flour based dough. Many bread recipes I have read only require you to knead the dough for a few minutes, generally less than 5. While this may produce tender sandwich bread, which is okay, it won't make the chewy yet supple pizza dough I desire.

By the way, because I learned the recipe for this bread in Europe, the majority of the measurements are in grams. I could convert everything to cups for you, but it would be far better for you to go out and buy a kitchen scale. They aren't terribly expensive and will make all your baking that much better.
. . .
. . .
. . .
Okay, fine, I will put the US measurements in at the recipe at the end of the post.