I have a thing for breads. My wife says I have a gift for them, in fact. It is true that I love to bake bread, and have been doing so for a long time.
At first, I followed recipes found in books and online. These worked pretty well, and I learned a lot about baking from the experience. Then, when I was serving a LDS mission in Switzerland, I found Betty Bossi's Brot und Brotgerichte, and discovered that one can use a standard bread recipe and technique to make lots of different types of bread. I also learned the basics of the science of bread baking—namely that you can substitute ingredients as long as you somehow make up the difference.
Then, while working for Lofthouse, I was able to take a series of online classes from the American Institute of Baking, called "The Science of Baking." As part of this course I learned about bakers' percentage, which changed how I view baking forever. In short, bakers' percentage, unlike formula percentage, sets all ingredients as a percent of the total weight of flour. Why is this so life-changing? Well, it means that you can easily change the amount of one ingredient without having to recalculate every other ingredient. I always use this technique when I am writing a recipe.
This recipe started as a desire to make a really, really rich and delicious dinner roll to accompany some baked potato soup. I wanted something that was airy yet filling, sweet and rich yet chewy, and full of delicious flavor. The secret to achieving all of this is in the technique, the ingredients, and some patience. And without further ado, let's dive into the recipe for the best dinner rolls you will ever have.
In case you are interested, this is the dinner roll recipe that my mom used to make when I was growing up (and still does now).
Step 0:
Before you begin mixing the dough, I HIGHLY suggest you "calibrate" your flour measuring skills. When you measure flour by volume, there is a huge amount of variability in how densely packed the flour is, which leads to variability in how much flour your are in fact measuring out. The conversion used in this recipe is 140 grams equal 1 cup all-purpose flour.
Or, to avoid confusion, just use a scale. The weights of each ingredient are found at the
end of the tutorial.
Step 1:
Pour
1 cup milk into a microwavable container capable of holding at least 2 cups. Microwave the milk on HIGH until the milk reaches 180°F, about 2 minutes.
If you so choose, you can do this in a saucepan on the stove, but it takes so much longer, and I am impatient in some things. The important thing to do is make sure the milk gets hot enough. Using milk in bread dough without scalding it first can make your dough slack and sticky. Scalding helps fix these problems.
Add
1 cup of ice-water, or enough ice to bring the level of the milk up to 2 cups.
The goal is to quickly lower the temperature of the liquid below 100°F. If you don't want to use ice or ice-water, just add room temperature water to the hot milk and wait. But again, I am impatient.
Step 2:

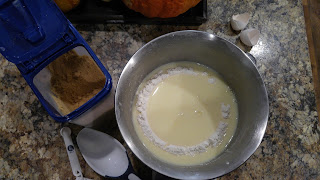
In the bowl of your stand mixer (fitted with the dough hook), combine
7-7 1/4 cups all-purpose flour,
4 1/2 tsp instant yeast (2 packets), and
1/2 cup brown sugar.
You really do want to use instant yeast here. The dough is so rich that it will already take a long time to rise, and instant yeast will "wake up" faster than active-dry yeast, so it will get you rising even faster.
Step 3:

Turn the mixer on medium-low speed and slowly
add the milk-water mixture and 2 eggs.

Mix until the dough comes together and forms a ball, then
add 1 1/4 tsp salt. Increase the speed to medium and
knead for 3-4 minutes.
 Why in the world don't I add the salt with the other dry ingredients? Well, it turns out that if you wait to add the salt, the dough will come together much faster. Do you really have to delay it? Well, no. But since it speeds up your mixing time, why not?
Step 4:

Reduce the speed to medium-low again, because now it is time to
add 1/2 cup butter.


Do this 1 tablespoon at a time, and wait until each piece has started to disappear before adding the next.
It will take a few minutes, but eventually all the butter will be absorbed. When this happens, increase the speed back to medium and
knead an additional 3-4 minutes.
 I feel that there a lot of little notes in this recipe. Anyway, the reason for adding the butter halfway through the kneading is to make sure that the gluten has started development before... ... ...well think of it this way.
Butter is 80% fat, and fat serves to coat and lubricate. This is why when you make gravy you combine the fat and flour before adding liquid to prevent lumps. In biscuits, you cut some of the fat into the flour to keep the biscuits from getting tough by coating some of the flour in fat, preventing gluten development, and yielding tender biscuits. On the other hand, we want our dinner rolls to have some bite, so we need gluten development. So, by delaying the addition of the fatty butter, we can control the degree of gluten development, and thus having chewy rolls that are still deliciously rich.

By the way, my youngest son was more interested in watching me make rolls instead of going to bed. He got fussy when I took him away from the mixer, so I got to make rolls holding a 20lb infant.
Step 4b:
Turn the kneaded dough out on the counter and form it into a ball.
Step 5:

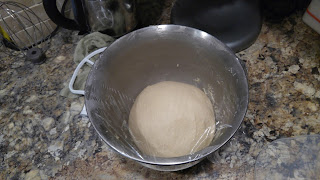
Lightly grease the mixing bowl and return the dough ball to the bowl. Cover with plastic and
allow to rise until double.

 This dough will take a long time to rise, and I really do mean a long time. Probably it will take more than an hour. Is it worth it? Yes—allowing the dough to rise until double will give it time to develop flavor, for the flour to completely absorb the liquid, and for the gluten to fully relax, allowing for easier forming. But to be honest, you could probably get away with a 20-30 minute rest and have pretty good rolls.
Step 6:
Turn the dough onto the counter and punch it down lightly to redistribute the larger gas bubbles.
Divide the dough into 24 equal pieces (about 75g each), and form each into a tight ball.

Arrange the balls on a lightly greased rimmed baking sheet and
brush with either oil or melted butter. Cover the pan with plastic and
let rise until double. This would also be a good time to
preheat the oven to 350°F.
Again, this will take some time, probably 30-45 minutes. Be patient here, if nowhere else. If you don't let the dough rise enough at this stage, you will wind up with very dense rolls and will be very, very sad that all of your hard work was somewhat wasted. If you don't have enough time, let the rolls rise in a warm place (like a car sitting out in the sun). The heat will help the yeast work faster to inflate your dough.
Step 7:
Remove the plastic, and (if you want to) slash the rolls across the diameter about 1/4" deep.
Slide the pan into the middle of your preheated oven, and
bake for 25 minutes.
When they come out the oven, immediately
brush the tops with cream or half-and-half. Allow to rolls to cool slightly before consuming, or if you are feeling weak (i.e.:don't care about burning your mouth), devour them at once! (^_^)


No comments :
Post a Comment