Red Velvet Cookies

DLD: Red Velvet Cookies

I have a bone to pick with red velvet. One does not simply make red velvet by adding red food coloring to an otherwise vanilla batter and call it good. Red velvet is so much more than it's color. Of course, I can't really blame anyone for this mistake because there is so much misinformation out there on what red velvet actually is. So, to set the record straight, and for my own peace of mind, I am going to set in stone (or bits and bytes) what I firmly believe red velvet to be.

After searching the internet for many red velvet recipes in an attempt to come to some sort of consensus, I concluded that red velvet is a mildly chocolate cake with background notes of both vinegar and buttermilk, also containing some form of red food coloring to heighten the already-present red anthocyanin present in the cocoa powder. There, I've said it. Red velvet is first and foremost a chocolate product. True, it is not as chocolaty as an Oreo©, but it is chocolaty nonetheless.

Well, on to the point of this post. The internet is riddled with red velvet in the form of cakes, cupcakes (shudder), brownies, crepes, pancakes, waffles, cake-mix cookies, etc. Don't get me wrong, there is nothing wrong with these things (except for the cupcakes. I don't like cupcakes), but I don't have a great love for any of them. What I really wanted was a cookie that I could roll out and cut into shapes, like sugar cookies. And don't you dare tell me that I can just put red food coloring into a sugar cookie. Didn't we already go over the fact that red velvet is chocolate at heart? No, I discovered that if I wanted a rolled red velvet cookie I would need to make my own recipe from scratch. So I did.

One more comment before I begin; it took me many tries to come up with this recipe, mainly because I wanted to get a good amount of chocolate flavor without making the cookie too brown. The solution is to use black cocoa, which is highly dutched or alkalized cocoa, in conjunction with natural cocoa powder. If you don't want to buy black cocoa you could probably get away with just using normal dutched cocoa, but please do not just use natural coca by itself. The flavor just isn't the same.


—Sam


Pita Bread

The other day I was talking to my older sister, and somehow the conversation turned to baking, and from there it turned to the topic of tonight's recipe: pita bread. I only really have one memory of pita growing up, and it just so happens to be of my sister eating a pita stuffed with sprouts and other stuff. A stuffed sandwich: I thought it was the coolest thing ever. In the years that followed I didn't give pita much thought, until I served an LDS mission in Switzerland, and was introduced to the Turkish food Doener Kebap, which is very similar to a Greek gyro. Both of those sandwiches are a pita stuffed with meat, vegetation, and sauce, and are some of the most delicious foods in the world.
So, back to the point of my story. My sister shared with me a recipe for pita, which has since become one of my favorite bread recipes, and I made it five times within the first 3 weeks. Each batch makes 10 discs of deliciousness.

Pita Bread

Step 1:
Dissolve 2 1/4 tsp yeast and 1 tsp sugar in 1/2 cup lukewarm water.
Allow to sit for 15 minutes, or until very foamy.

Step 2:
In the bowl of your mixer combine 3 cups all-purpose or bread flour and 1 tsp salt.

Step 3:
Add the yeasty water to the flour, along with the remaining 1/2 cup water. Mix well with dough attachment.

Step 4:
Knead on medium speed for 10 minutes.

Step 5:
Gather dough into a ball, cover, and let rise for 2 hours.

For pictures and further instructions on making dough please refer to my pizza dough recipe.

Before you start working with the dough, preheat your oven to 500°F. It may seem like a very high temperature, and it is, but it is the key to making your pita have a pocket in them, which is what we want.

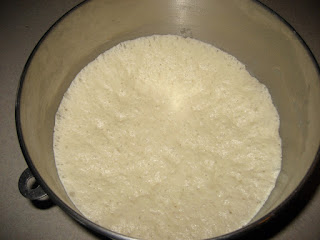
After rising, the dough will look like this.

Step 6:
Gather the dough into a ball.
I often weigh the dough when I am going to be dividing it so that each piece is the same size.

Step 7:
Divide the dough into 10 equal-sized portions and roll each one into a ball. Store the balls under a plastic bag so they don't dry out.

Step 8:

On a lightly floured surface, roll each ball into a 5" disc, 1/4" thick.
Resist the urge to make larger pita by rolling the ball into a larger circle. Doing so will make the dough too thin, and will create a cracker upon baking.

Step 9:
 If you are using a pizza stone, move it to the bottom rack.
Arrange three dough discs on the stone (my sister does up to 5 on a cookie sheet).

Step 10:
 Bake for 4 minutes, then flip and bake for another 2 minutes.
After about 2 minutes, the pita will seem to inflate. This is good: this is what creates the pocket in the middle of your pita. Mine often then pop and deflate while in the oven, but they still have a pocket.

Step 11:
 Remove to a rack and consume, or let cool and bag for up to a week at room temperature.


Pita Bread
1 cup lukewarm water, divided
2 1/4 tsp yeast
1 tsp sugar
3 cups all-purpose flour
1 tsp salt

Dissolve the sugar and yeast in 1/2 cup water. Let sit for 15 minutes, or until very foamy. Combine flour and salt in the bowl of a stand mixer. Add the yeast mixture and the remaining water and mix with dough hook until combined, then increase the speed to medium and knead for 10 minutes. Gather dough into a ball, cover, and let rise 2 hours. Preheat oven to 500°F and move rack to lowest position. Divide the dough into 10 equal-sized pieces, and roll each piece into a ball. On a lightly floured surface, roll each ball into a 5" disc, 1/4" thick. Arrange 3 at a time on a pizza stone or cookie sheet. Bake for 4 minutes, then flip and bake an additional 2 minutes. Remove to a rack. Enjoy warm, or place in an airtight container for up to a week.